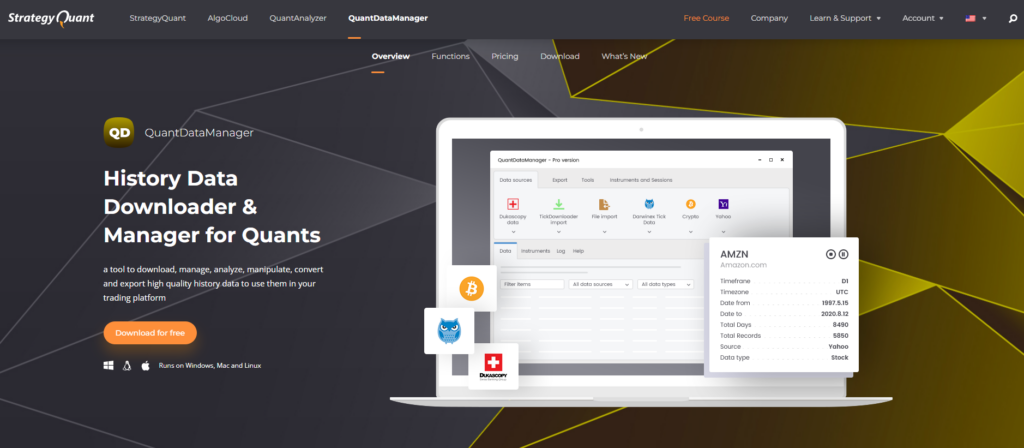
How to Backtest Any EA with 10 Years of Data Using QuantDataManager
Backtesting an Expert Advisor (EA) with high-quality historical data is essential for accurate and reliable results. Many traders struggle with missing data, incorrect tick modeling, or limited historical coverage, which leads to misleading performance analysis.
In this guide, we’ll walk you through how to use StrategyQuant QuantDataManager (QDM) to backtest any EA with 10+ years of data while ensuring 100% tick modeling accuracy in MetaTrader 4 (MT4) or MetaTrader 5 (MT5).
Why Use QuantDataManager for Backtesting?
✅ Access Up to 20 years of Tick Data: QuantDataManager provides high-quality historical tick and M1 data from multiple sources, ensuring reliable backtesting results.
✅ Achieve 100% Tick Modeling Accuracy: By using tick data instead of interpolated price movements, you get precise historical simulations that closely resemble real market conditions.
✅ Eliminate Broker Data Gaps: Most brokers only provide a few months to a couple of years of historical data, leading to unreliable results. QDM fills in those gaps with complete historical records.
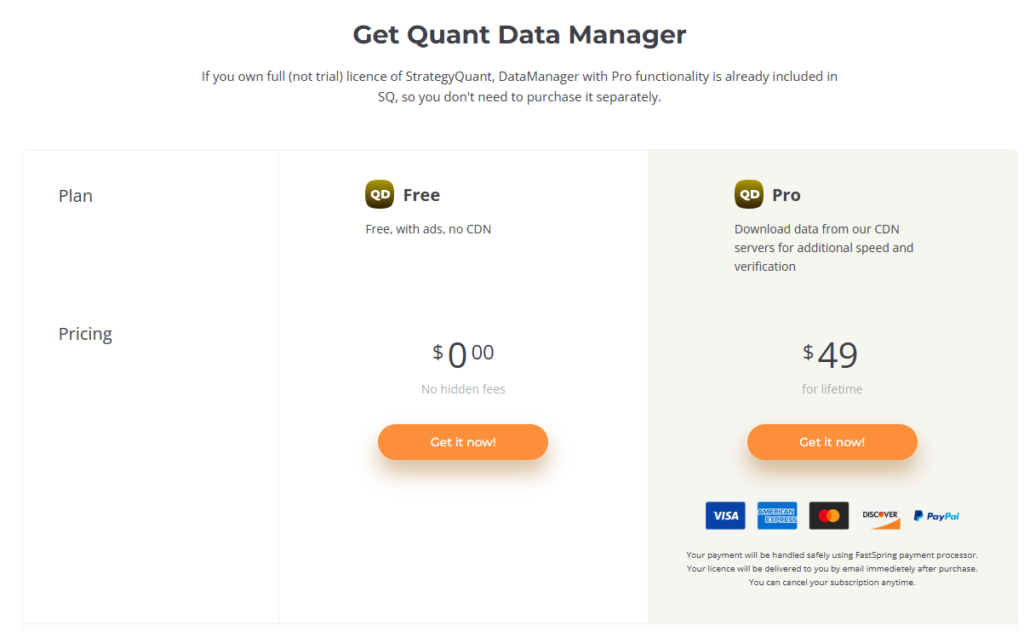
✅ Free Version Available, But the Paid Version Pays for Itself: QuantDataManager offers a free version, allowing you to test its features before committing. However, the full version costs only $49 for a lifetime license, giving you unlimited access to high-quality data. Considering the cost of bad backtests or poor trading decisions, this tool pays for itself quickly by ensuring accurate historical data for reliable strategy development.
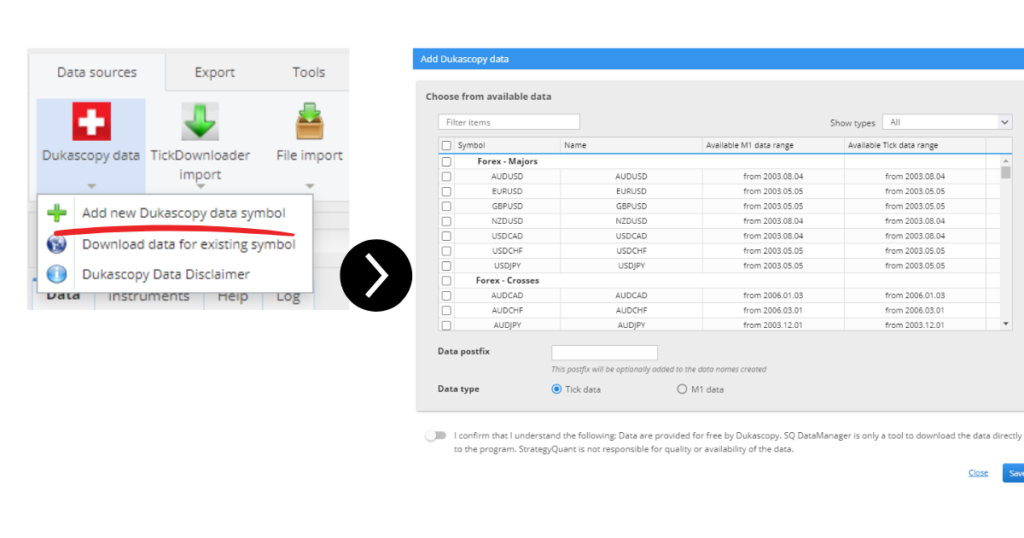
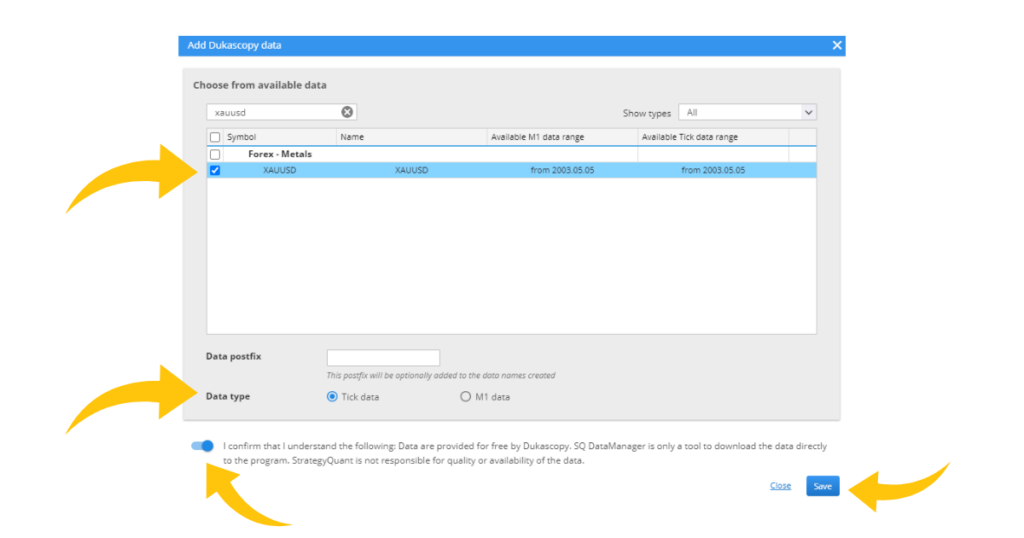
Select “Add new Dukascopy data symbol”. It should open up another window where you can see the available data.
Type the Desired instrument. In this example we will use XAUUSD. make sure to tick the box and agree with the terms and conditions as shown in the image.
In the main window of QDM, select the XAUUSD again by ticking the box beside the pair name.
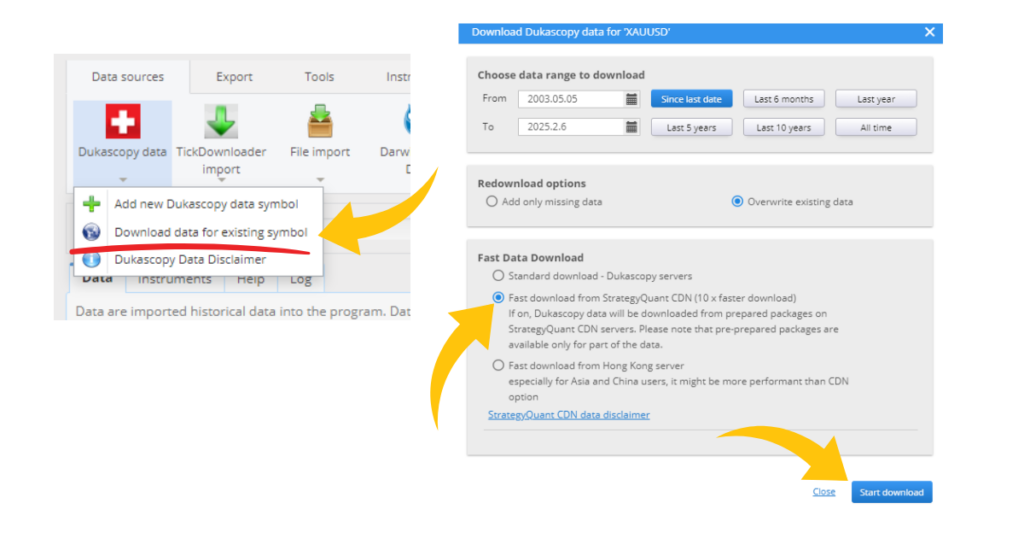
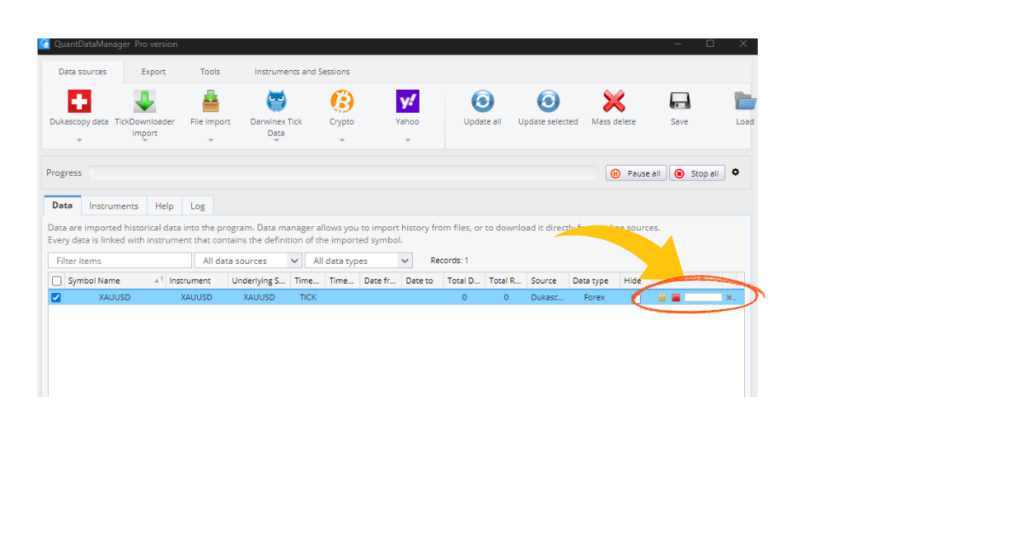
Click on “Dukascopy” at the top again, but this time select “Download data for existing symbol.” This should open another window where you can select the date range. In this example, I chose “All Time.” Then, click “Start Download.” This process may take some time, so you can leave it running and check back later once the download has started.
Click on “Dukascopy” at the top again, but this time select “Download data for existing symbol.” This should open another window where you can select the date range. In this example, I chose “All Time.” Then, click “Start Download.” This process may take some time, so you can leave it running and check back later once the download has started.
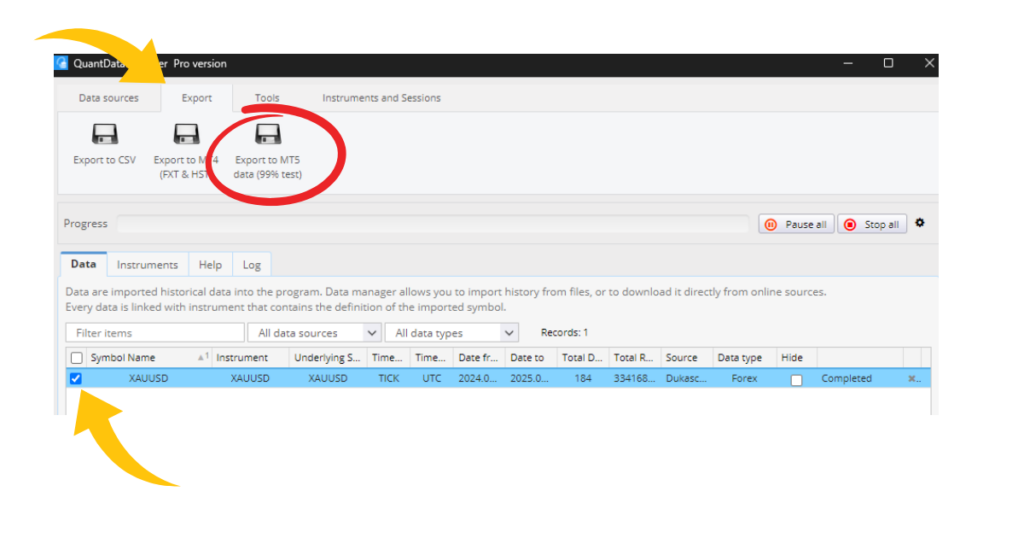
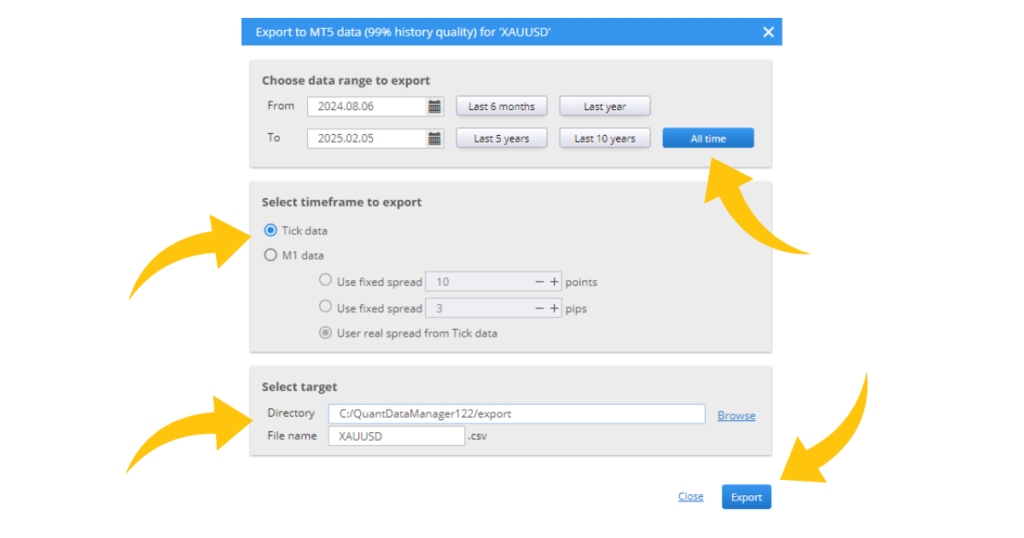
Once the dowload is complete, click the Export Tab, select “Export to MT5 Data”
Another window should appear. Fill in the required data. Make sure that the Filename includes a clear suffix, such as “XAUUSD_10YearsData”, so you can easily identify it later.
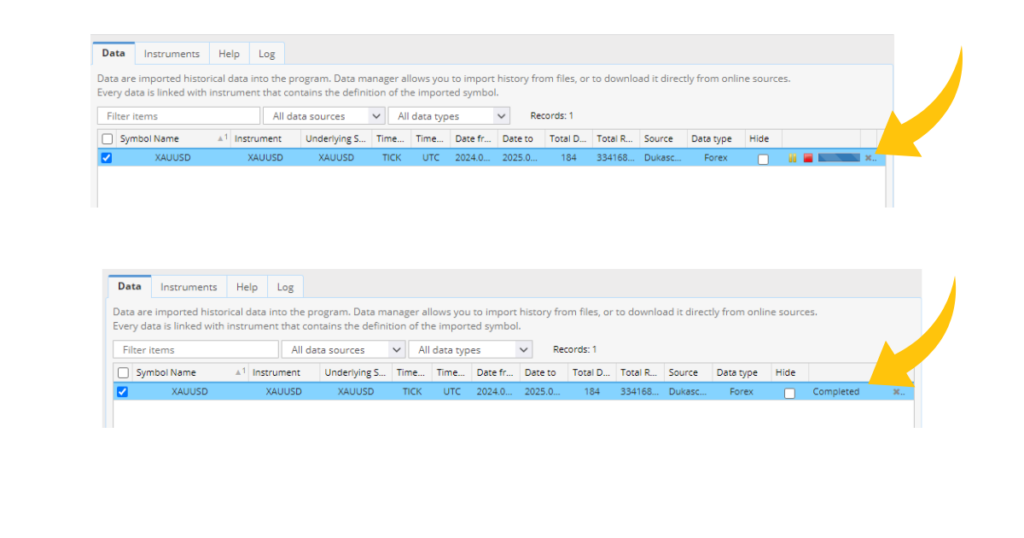
It should start saving the tick data. Wait for it to download.
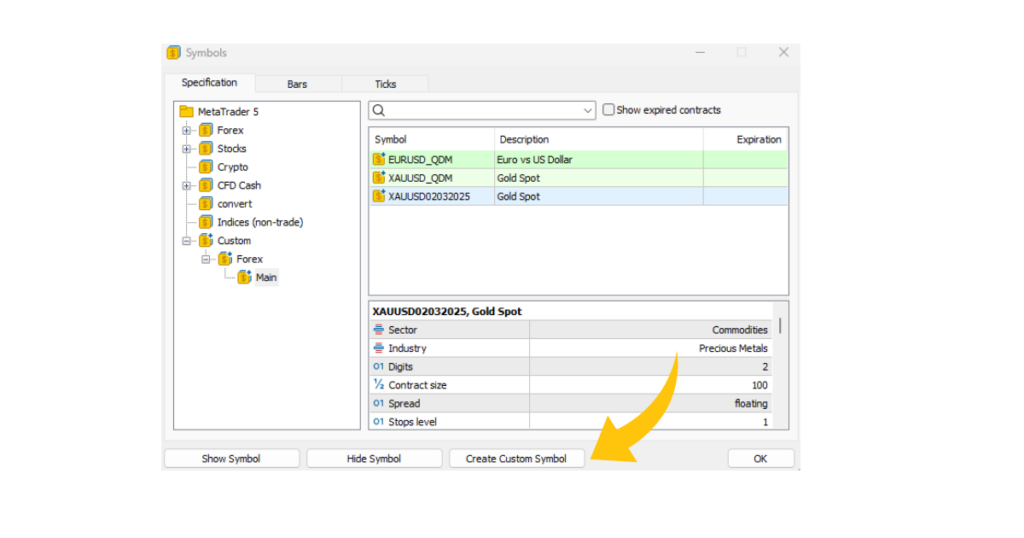
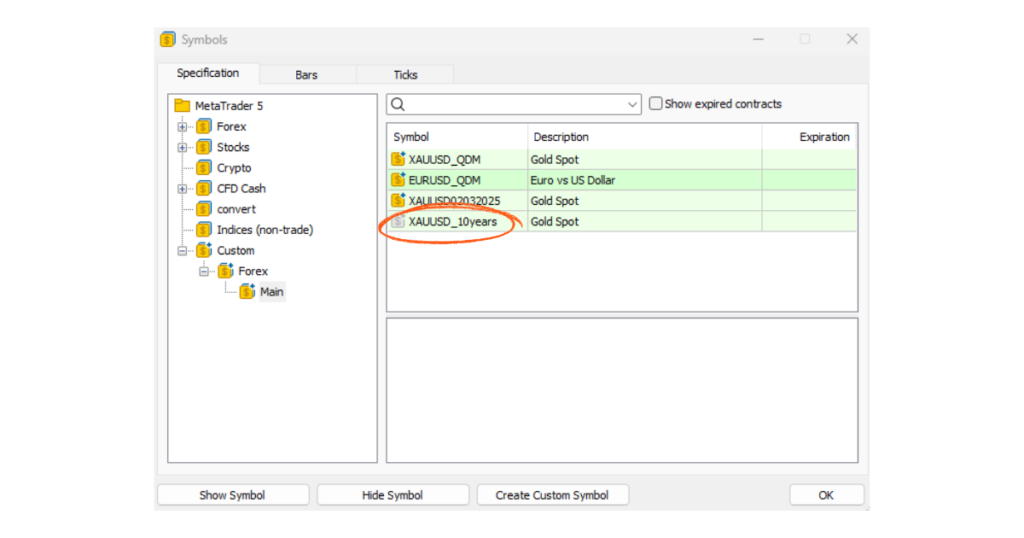
Then, go to your MetaTrader 5 terminal and open the “Symbol List.” This window should appear. Next, select “Create Custom Symbol.”
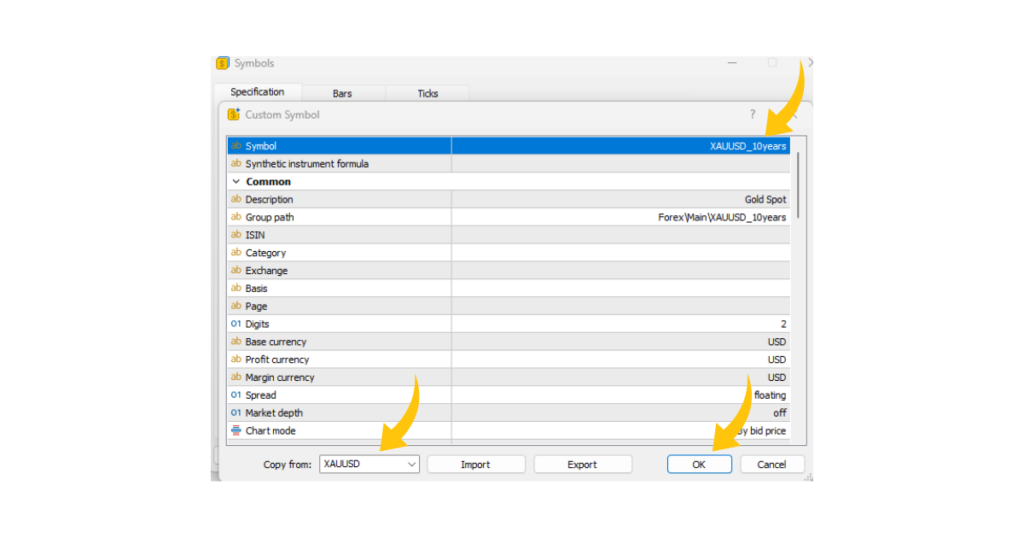
We need to copy the details of XAUUSD from another broker. In the “Copy From” section, select XAUUSD, then click OK. Make sure to also change the “Symbol” field to a name that you can easily identify later.
The created symbol should appear, but it will still be empty. Now, let’s populate it with tick data from QuantDataManager (QDM).
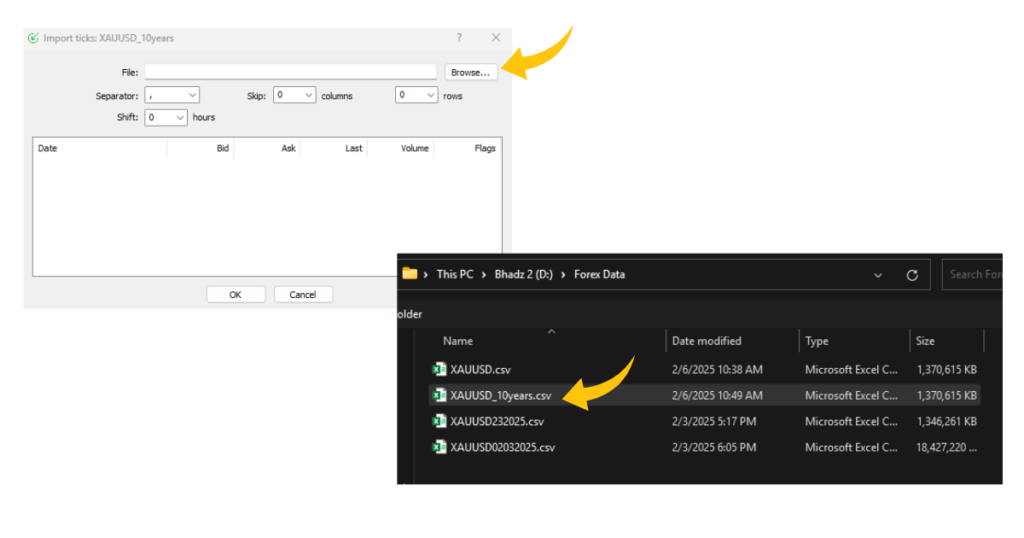
In the “Ticks” tab, select the symbol you’ve created, then click “Import Ticks.”
Select the file you downloaded from QDM earlier.
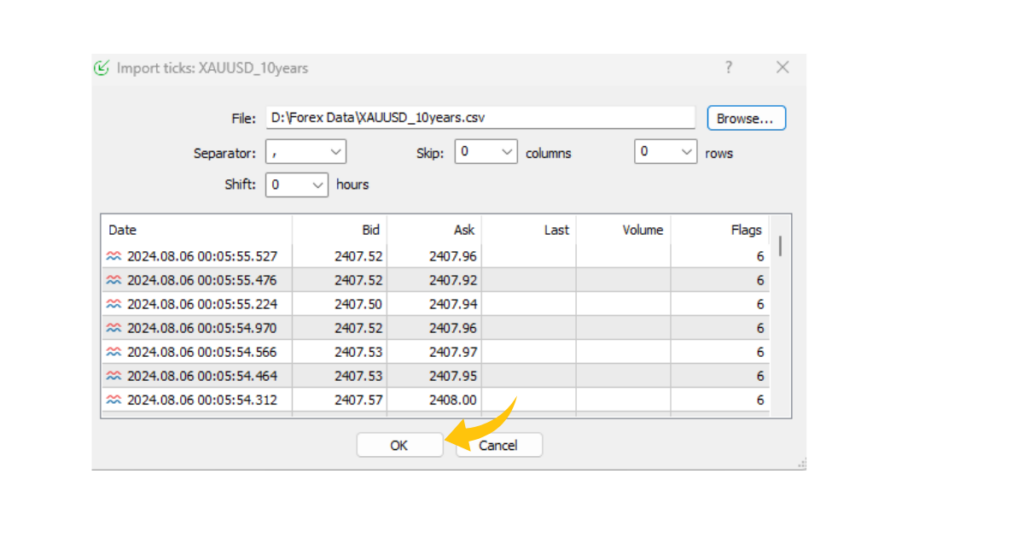
Press OK, and it should start importing the data.
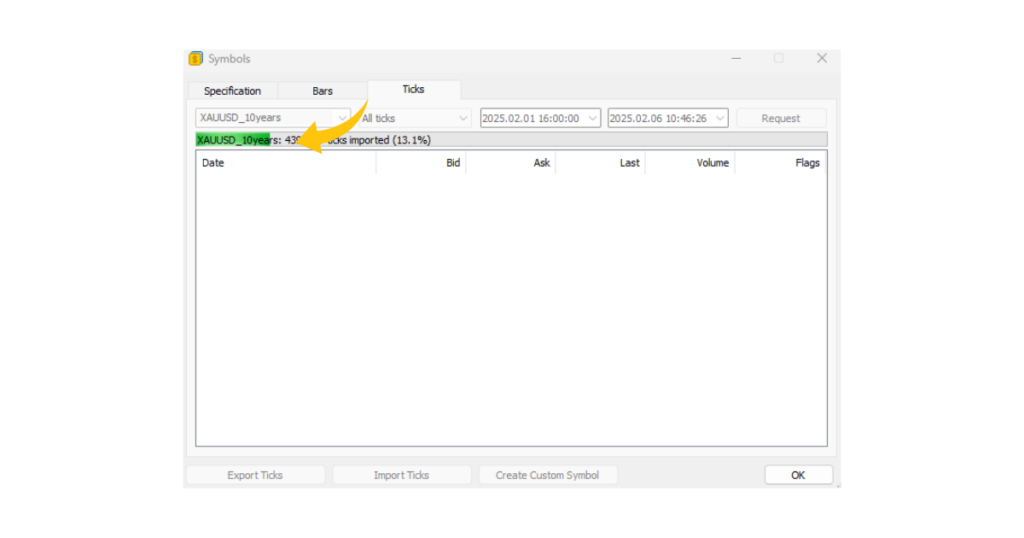
It should now fill up with data. Once the data is loaded, press OK to confirm.
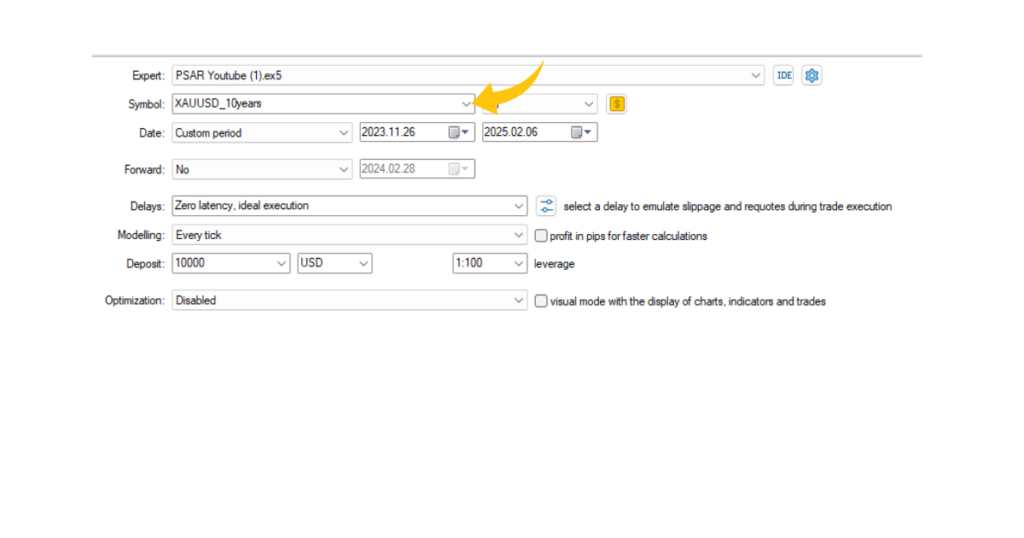
You should now be able to see the newly created symbol in the Symbol List and use it for backtesting! And that’s it! 🚀